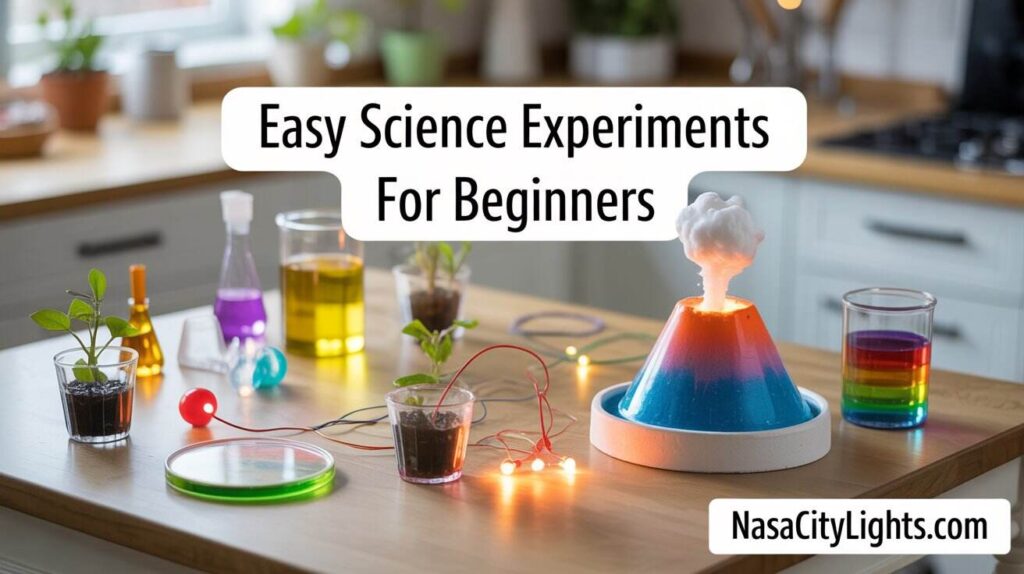
Easy Science Experiments for Beginners: Amazing Projects You’ll Love
Introduction
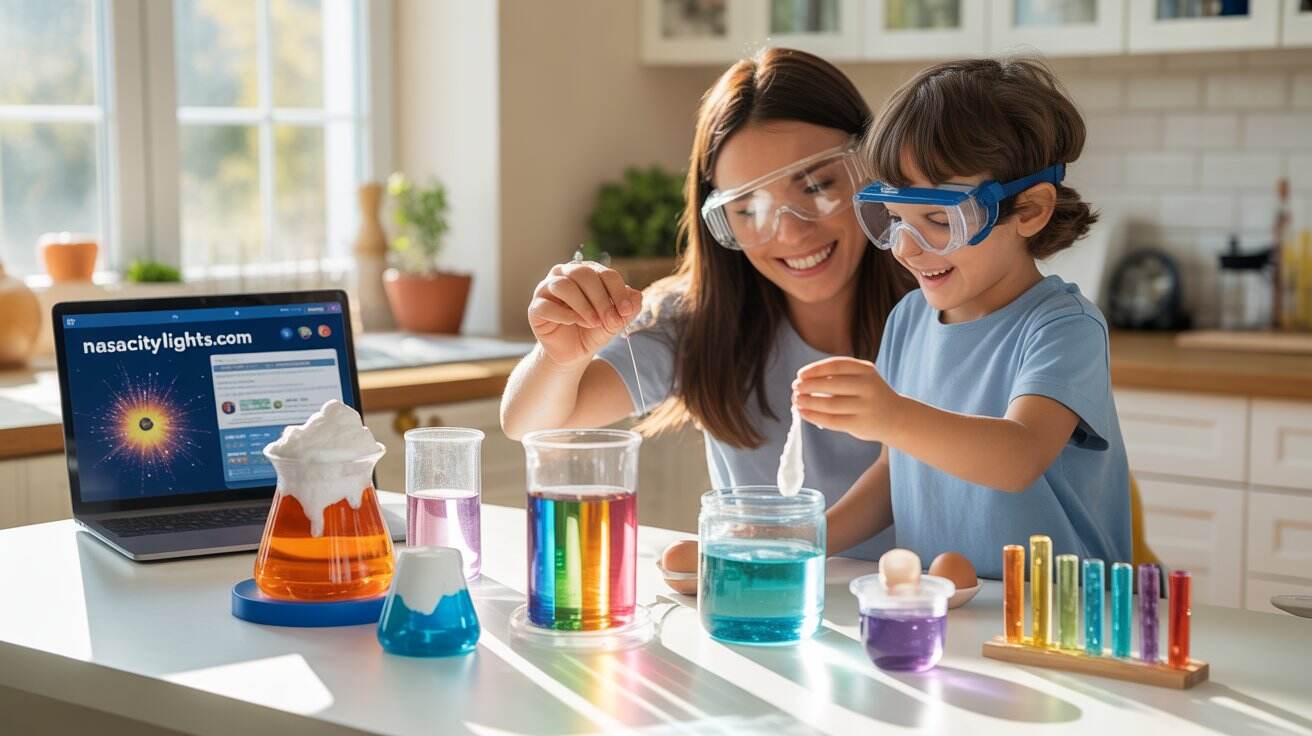
Science doesn’t have to feel intimidating or complicated. You don’t need expensive equipment or advanced degrees to explore fascinating scientific principles right at home. The beauty of easy science experiments for beginners lies in their simplicity and the incredible learning they provide using everyday household items.
Whether you’re a parent looking to engage your children, a teacher seeking classroom activities, or someone curious about science, these experiments will spark wonder and understanding. The best part? Most require materials you already have in your kitchen or bathroom cabinet. No special trips to science supply stores necessary.
This guide presents easy science experiments for beginners that actually work and deliver impressive results. You’ll discover projects covering chemistry, physics, biology, and earth science. Each experiment includes clear instructions, explains the science behind the magic, and offers variations to extend learning. Get ready to transform your home into an exciting laboratory where discovery happens naturally and learning feels like play.
Why Science Experiments Matter for Learning
Science experiments transform abstract concepts into tangible experiences. When you physically conduct experiments, you engage multiple senses and learning pathways. This hands-on approach creates deeper understanding than reading textbooks alone ever could.
Building Critical Thinking Skills
Experiments teach you to observe carefully and ask questions. You learn to form hypotheses and test them systematically. When results surprise you, you develop problem-solving skills by figuring out what happened and why.
The scientific method becomes second nature through repeated experimentation. You start thinking like a scientist without even realizing it. This analytical approach benefits every area of life, from cooking to car repairs.
Children especially benefit from experimental learning. Their natural curiosity finds perfect outlets in hands-on science. The confidence they gain from successful experiments encourages further exploration and learning.
Making Science Accessible and Fun
Many people feel disconnected from science because it seems too complex. Easy science experiments for beginners break down this barrier completely. When you create a volcano eruption or make slime, science feels approachable and exciting.
The entertainment factor shouldn’t be underestimated either. Science experiments that produce colorful reactions, surprising transformations, or dramatic results capture attention powerfully. This engagement creates positive associations with scientific learning.
Family bonding happens naturally during experiments too. Parents and children working together on projects create memories while learning. These shared experiences often inspire lifelong interests in science and discovery.
Safety First: Essential Guidelines
Before starting any experiment, understanding basic safety principles protects everyone involved. Most easy science experiments for beginners are completely safe when you follow simple precautions.
Adult Supervision Requirements
Young children should always have adult supervision during experiments. Even simple projects can present unexpected hazards. Adults can guide procedures, prevent accidents, and help children understand what’s happening.
Teenagers can handle many experiments independently after proper instruction. However, any experiment involving heat, chemicals, or sharp objects requires adult presence. Safety always takes priority over independence.
Adults conducting experiments should also follow safety guidelines carefully. Overconfidence can lead to accidents just as easily as inexperience. Respect the materials and processes regardless of your skill level.
Protective Equipment and Workspace
Safety glasses protect eyes from splashes and flying debris. Even gentle reactions can sometimes splash unexpectedly. Inexpensive safety glasses are worth the small investment for peace of mind.
Work in well-ventilated areas, especially for experiments producing fumes or strong odors. Open windows or work outdoors when possible. Good ventilation prevents inhaling concentrated vapors that might irritate lungs.
Cover work surfaces with newspapers, plastic tablecloths, or trays. This protection makes cleanup easier and prevents damage to furniture. Designated science spaces help contain messes and organize materials efficiently.
Material Handling and Storage
Read all ingredient labels before using any materials. Some household products shouldn’t be mixed together. Understanding what you’re working with prevents dangerous chemical reactions.
Store materials properly between experiments. Keep chemicals away from food storage areas. Label everything clearly so family members know what containers hold. Proper storage prevents accidental misuse.
Dispose of experiment materials responsibly. Don’t pour chemicals down drains unless specifically safe to do so. Research proper disposal methods for anything potentially harmful. Environmental responsibility matters as much as personal safety.
Classic Chemistry Experiments
Chemistry experiments demonstrate how substances interact and transform. These easy science experiments for beginners reveal the fascinating world of molecules and reactions using common household items.
Baking Soda and Vinegar Volcano
This classic experiment never gets old because the reaction is so dramatic and satisfying. You create a miniature volcanic eruption using simple kitchen ingredients that are completely safe.
Materials needed:
- Baking soda
- White vinegar
- Dish soap
- Food coloring
- Container (plastic bottle or cup)
- Tray to catch overflow
Build a mountain around your container using clay, playdough, or dirt. Add several tablespoons of baking soda to the container. Mix in a few drops of dish soap and food coloring. Pour vinegar into the container and watch the eruption happen.
The science behind this reaction involves acid and base interaction. Vinegar contains acetic acid while baking soda is sodium bicarbonate, a base. When combined, they produce carbon dioxide gas. The gas bubbles create the foaming eruption. Dish soap makes bigger, longer-lasting bubbles for more impressive results.
You can vary this experiment by adjusting ingredient ratios. More baking soda creates longer reactions. Different food coloring combinations make colorful lava flows. Try adding glitter for sparkly eruptions that children especially love.
Invisible Ink Messages
Creating secret messages with invisible ink feels like spy work while teaching about chemical reactions and pH indicators. This experiment works beautifully and never fails to impress.
What you’ll need:
- Lemon juice or milk
- Cotton swabs or small paintbrush
- White paper
- Heat source (lamp or iron)
Dip your cotton swab in lemon juice and write messages on white paper. Let the paper dry completely until writing becomes invisible. Apply gentle heat using a lamp, iron, or hairdryer. The writing reappears in brown as the lemon juice oxidizes.
The science involves oxidation processes. Lemon juice contains carbon compounds that remain nearly invisible when wet. Heat causes these compounds to break down and oxidize, turning brown. The same principle works with milk, orange juice, or honey.
This experiment teaches about oxidation, pH levels, and how heat affects chemical bonds. Children learn that invisible doesn’t mean absent. The substances were always there, just not visible until conditions changed.
Color Changing Milk Art
This mesmerizing experiment combines chemistry with artistic beauty. The swirling colors create patterns that look almost magical while demonstrating important scientific principles.
Materials required:
- Whole milk
- Food coloring (multiple colors)
- Dish soap
- Shallow dish or plate
- Cotton swabs
Pour milk into your shallow dish until it covers the bottom about half an inch deep. Add drops of different food coloring around the milk surface. Don’t stir. Touch a soap-covered cotton swab to the milk surface near the food coloring. Watch colors explode into motion, creating swirling patterns.
This reaction demonstrates how soap affects surface tension. Milk contains fat molecules and water. Food coloring floats on the surface initially. Dish soap breaks apart fat molecules, disrupting surface tension. This disruption causes the rapid movement that creates the color patterns.
The experiment teaches about molecular structure, surface tension, and emulsification. You can experiment with different milk types. Skim milk produces less dramatic results than whole milk because it contains less fat. The fat content directly affects reaction intensity.
Fascinating Physics Projects
Physics experiments demonstrate forces, energy, and motion principles. These easy science experiments for beginners make abstract physics concepts visible and understandable through direct observation.
Homemade Lava Lamp
Creating a temporary lava lamp demonstrates density, polarity, and chemical reactions beautifully. The results look professional despite using simple household materials.
What you need:
- Clear bottle or jar
- Vegetable oil
- Water
- Food coloring
- Alka-Seltzer tablets or baking soda
Fill your bottle about three-quarters full with vegetable oil. Add water until nearly full, leaving space at the top. Water will sink below oil because it’s denser. Add several drops of food coloring. The coloring mixes with water but not oil because water is polar while oil is nonpolar.
Break an Alka-Seltzer tablet into pieces and drop one in. Gas bubbles form and carry colored water upward through the oil. When bubbles pop at the surface, the water sinks again. This cycle continues until the tablet dissolves completely, creating the lava lamp effect.
The science involves density differences and gas production. Oil and water don’t mix due to polarity differences. The chemical reaction produces carbon dioxide bubbles lighter than both liquids. These bubbles carry water droplets upward before popping and releasing them.
Balloon Rocket Races
This experiment demonstrates Newton’s third law of motion in an exciting, competitive way. You literally see action and reaction principles in motion.
Materials needed:
- Balloons
- String or fishing line
- Straws
- Tape
- Two anchor points
Thread string through a straw and stretch it tightly between two anchor points. Inflate a balloon without tying it and tape it to the straw. Release the balloon and watch it rocket along the string as air escapes.
Newton’s third law states that every action has an equal and opposite reaction. Air rushing backward from the balloon pushes the balloon forward with equal force. This propulsion principle powers real rockets in space.
You can experiment with different balloon sizes, shapes, and inflation levels. Measure distances traveled and compare results. This variation teaches experimental design and data collection while reinforcing physics concepts.
Floating Egg Density Test
This simple experiment demonstrates density principles clearly and produces impressive results that seem to defy expectations about how objects behave in water.
Required materials:
- Fresh eggs
- Water
- Salt
- Clear glasses
Fill one glass with plain water and another with very salty water. Place eggs in both glasses. The egg in plain water sinks while the egg in salt water floats. This dramatic difference illustrates density principles perfectly.
Fresh eggs are denser than plain water, causing them to sink. Adding salt increases water density. When salt water becomes denser than the egg, buoyancy forces push the egg upward. You can create an egg that neither floats nor sinks by adjusting salt concentration carefully.
This experiment explains why swimming in oceans feels easier than swimming in pools. Salt water’s higher density provides more buoyancy. The Dead Sea’s extreme saltiness makes people float effortlessly.
Simple Biology Experiments
Biology experiments reveal how living things work and interact with environments. These easy science experiments for beginners explore life sciences using accessible materials and clear methods.
Growing Crystals from Sugar or Salt
Crystal growing demonstrates how molecules arrange themselves into organized structures. Watching crystals form over days teaches patience while revealing beautiful natural geometry.
What you’ll need:
- Sugar or salt
- Water
- Glass jar
- String
- Pencil or stick
- Food coloring (optional)
Boil water and dissolve as much sugar or salt as possible, creating a supersaturated solution. Pour the solution into your jar and add food coloring if desired. Tie string to a pencil and suspend it in the solution. Crystals will form on the string over several days.
The science involves solubility and evaporation. Hot water dissolves more sugar or salt than cold water. As the solution cools and water evaporates, dissolved molecules have nowhere to go except onto available surfaces. They arrange into crystal structures following their natural molecular geometry.
Sugar creates larger, more complex crystals than salt. The process takes patience but rewards you with beautiful results. This experiment teaches about saturation points, evaporation rates, and molecular structures.
Celery Water Absorption
This classic experiment visualizes how plants transport water from roots to leaves. The dramatic color change makes the invisible process visible and understandable.
Materials required:
- Fresh celery stalks with leaves
- Food coloring
- Water
- Clear glasses or jars
Fill glasses with water and add several drops of food coloring. Cut celery stalks at an angle and place them in colored water. Wait several hours or overnight. The leaves change color as colored water travels through the celery.
Plants contain vascular systems called xylem that transport water upward. Capillary action and transpiration work together to move water from roots to leaves. The food coloring makes this invisible process visible as it travels through the celery’s vascular system.
You can dissect the celery after the experiment to see the colored tubes inside. This visualization helps understanding of plant anatomy. Try different colors in multiple stalks to create rainbow celery bouquets.
Mold Growth Study
Observing mold growth teaches about microorganisms, decomposition, and environmental conditions affecting biological processes. This experiment requires minimal setup but provides maximum learning.
What you need:
- Bread slices
- Plastic bags
- Water
- Labels
Place bread slices in separate plastic bags. Add a few drops of water to some bags while keeping others dry. Store bags in different locations like refrigerators, dark cabinets, or sunny windowsills. Label each bag with its conditions. Observe daily for mold growth.
Mold requires moisture, warmth, and organic material to grow. Comparing different conditions reveals which environments promote or inhibit mold growth. Wet bread in warm, dark places develops mold fastest. Cold, dry conditions slow or prevent growth.
This experiment teaches about microorganisms, decomposition, and preservation methods. Understanding mold growth explains why we refrigerate food and keep things dry. The practical applications make the science immediately relevant to daily life.
Earth Science Explorations
Earth science experiments demonstrate geological, meteorological, and environmental principles. These easy science experiments for beginners explore our planet’s processes using household materials.
Water Cycle in a Bag
This miniature water cycle demonstration shows evaporation, condensation, and precipitation processes clearly. The sealed system creates a perfect model of how Earth’s water cycles continuously.
Materials needed:
- Zip-lock plastic bag
- Water
- Blue food coloring
- Permanent marker
- Tape
Draw a simple water scene on your bag with a permanent marker, including ocean, clouds, and sun. Add water with blue food coloring to represent the ocean. Seal the bag completely and tape it to a sunny window. Watch as water evaporates, forms droplets on the bag’s upper surface, and rains back down.
The sun’s heat causes water molecules to evaporate and rise. When warm water vapor contacts the cooler plastic surface, it condenses into droplets. These droplets eventually become heavy enough to fall, completing the cycle.
This demonstration models Earth’s actual water cycle. The same processes happen globally with oceans, atmosphere, and precipitation. Understanding this cycle helps explain weather patterns, rain formation, and water conservation importance.
Rock Candy Geology
Growing rock candy teaches about crystal formation and mineral deposits while creating delicious treats. This experiment bridges chemistry and earth science beautifully.
What you’ll need:
- Sugar
- Water
- Glass jars
- Wooden skewers or string
- Clothespins
- Saucepan
Heat water and dissolve sugar until no more will dissolve, creating supersaturated solution. Pour into jars and suspend skewers using clothespins. Crystals form on skewers over several days as water evaporates and sugar molecules arrange themselves.
This process mirrors how mineral deposits form in nature. Underground water dissolves minerals from surrounding rocks. As water evaporates or temperature changes, dissolved minerals crystallize. Over time, these crystals build into the mineral deposits and gems we find in nature.
The experiment teaches patience as crystals grow slowly. Checking progress daily without disturbing the jars provides ongoing learning opportunities. The edible results make this experiment especially popular with children.
Homemade Tornado in a Bottle
Creating a vortex in a bottle demonstrates rotational motion and how tornadoes form. This mesmerizing experiment produces impressive visual effects while teaching important meteorological concepts.
Materials required:
- Two clear plastic bottles
- Water
- Glitter or small beads
- Duct tape or tornado tube connector
Fill one bottle about two-thirds full with water. Add glitter for visibility. Connect both bottles at their openings using duct tape or a special connector. Flip the bottles so the full one is on top. Swirl in circular motions. Water forms a tornado-like vortex as it drains into the lower bottle.
The vortex forms because circular motion creates centripetal force. Water spinning in circles moves toward the center, creating the funnel shape. Air moves up through the center while water moves down around the edges.
This models how real tornadoes form when rotating air creates funnels. The visible vortex helps understanding of rotational dynamics and fluid motion. Adding different materials like oil creates additional learning opportunities about density and immiscibility.
Tips for Successful Experiments
Conducting easy science experiments for beginners successfully requires more than just following instructions. These strategies help ensure positive results and maximize learning opportunities.
Preparation and Organization
Gather all materials before starting experiments. Missing items midway through procedures creates frustration and breaks momentum. Reading instructions completely beforehand prevents surprises and helps you understand overall processes.
Organize your workspace logically with materials within easy reach. Clear surrounding areas to prevent accidents. Having dedicated science spaces, even if just a tray or table corner, helps establish experimental routines.
Take time to understand the science before starting. Knowing what should happen and why helps you observe more effectively. This preparation transforms experiments from mere activities into genuine learning experiences.
Recording Observations
Keep a science notebook to record predictions, observations, and conclusions. Writing reinforces learning and creates records you can reference later. Even simple notes significantly enhance educational value.
Encourage drawing diagrams, taking photos, or making videos of experiments. Visual documentation captures details that written descriptions might miss. These records become treasured memories and learning resources.
Compare predictions with actual results. When outcomes surprise you, investigate why. Unexpected results often provide the richest learning opportunities. Science advances through investigating anomalies and unexpected findings.
Troubleshooting Common Problems
Experiments sometimes don’t work as expected. Don’t get discouraged by failures. Scientific inquiry involves testing, failing, adjusting, and trying again. This process teaches resilience and problem-solving skills.
Common issues include incorrect measurements, contaminated materials, or environmental factors. Review procedures carefully when results disappoint. Small changes in temperature, humidity, or ingredient freshness can significantly affect outcomes.
Ask questions when experiments fail. What changed? What might work differently? How could you modify the procedure? This analytical approach turns failures into valuable learning experiences rather than frustrations.
Expanding Your Science Journey
Once you’ve mastered these easy science experiments for beginners, numerous paths lead to deeper exploration. Science learning never truly ends because discovery opportunities exist everywhere.
Building on Basic Experiments
Most simple experiments can be extended through variations and additional questions. Change one variable at a time and observe results. This systematic approach teaches experimental design and scientific methodology.
Combine concepts from different experiments to create new projects. Chemistry and physics often overlap in fascinating ways. Biology experiments can incorporate earth science elements. Creative combinations lead to unique discoveries.
Research the science behind experiments more deeply. Understanding molecular structures, physical laws, or biological processes at deeper levels satisfies curiosity and builds comprehensive knowledge. Every experiment opens doors to further learning.
Connecting Science to Daily Life
Look for science principles in everyday activities. Cooking involves chemistry. Sports demonstrate physics. Gardening applies biology. Recognizing science everywhere makes learning feel natural and relevant.
Encourage questions about how things work. Why does bread rise? How do airplanes fly? What makes rainbows? These questions lead to investigation and experimentation. Curiosity drives the best scientific learning.
Share discoveries with others. Teaching someone else reinforces your own understanding. Science communication skills matter as much as experimental skills. Explaining concepts clearly deepens comprehension while spreading knowledge.
Resources for Continued Learning
Libraries offer countless science books appropriate for all levels. Children’s science books often explain concepts brilliantly with clear language and helpful illustrations. Don’t overlook these valuable resources regardless of your age.
Science museums provide hands-on learning experiences that complement home experiments. Many museums offer workshops, demonstrations, and special programs. These experiences inspire continued exploration and learning.
Local science clubs, workshops, or classes create communities of fellow learners. Sharing experiments and discoveries with others who appreciate science enriches the experience. Learning becomes social and collaborative rather than solitary.
Conclusion
Easy science experiments for beginners open doors to understanding our amazing world. These simple projects using household materials prove that science belongs to everyone, not just professionals in laboratories. When you conduct experiments, you’re not just learning facts. You’re developing critical thinking, problem-solving skills, and scientific literacy that benefit every aspect of life.
The experiments covered here represent starting points for endless exploration. Each successful project builds confidence and curiosity that drive further learning. Whether you’re volcano eruptions with baking soda, growing crystals, or creating mini water cycles, you’re engaging with fundamental scientific principles that explain how our universe works.
Remember that mistakes and unexpected results teach as much as perfect outcomes. Science progresses through questioning, testing, and learning from failures. Embrace the experimental process completely, including the surprises and challenges.
Most importantly, have fun while learning. Science should spark joy and wonder, not stress or frustration. These easy science experiments for beginners prove that discovering how things work can be exciting, accessible, and deeply satisfying. So gather your materials, prepare your workspace, and start experimenting. What scientific mysteries will you unravel today? Share your discoveries with family and friends, and inspire others to begin their own scientific journeys.
Frequently Asked Questions
What are the easiest science experiments to start with?
The baking soda and vinegar volcano is the easiest science experiment for absolute beginners. It requires only two common ingredients, works reliably, and produces dramatic visible results. Other extremely easy options include floating eggs in salt water, growing mold on bread, and creating invisible ink with lemon juice. These experiments require minimal preparation and materials most households already have.
Are these science experiments safe for young children?
Most easy science experiments for beginners are safe for children with proper adult supervision. Experiments using food items like baking soda, vinegar, sugar, and salt present minimal risks. Always supervise children during any experiment, even simple ones. Avoid experiments involving heat, sharp objects, or potentially harmful chemicals without direct adult involvement and appropriate safety measures.
How much do science experiment materials cost?
Most easy science experiments for beginners cost very little since they use household items. Common experiments might cost only a few dollars if you need to purchase anything at all. Baking soda, vinegar, food coloring, salt, and sugar are inexpensive and useful for multiple experiments. Initial investment in basic supplies like clear containers and measuring tools serves many different projects.
How long do most beginner experiments take?
Simple science experiments typically take 15 to 30 minutes for the actual procedure. Some experiments like crystal growing or mold observation require days of waiting between setup and results. The hands-on portions remain quick even for longer experiments. This time commitment makes science experiments perfect for short attention spans or busy schedules.
Can I do science experiments without special equipment?
Absolutely! The beauty of easy science experiments for beginners is that they use everyday household items. Clear glasses, plastic bottles, measuring cups, and mixing bowls replace expensive laboratory equipment. Most homes already contain everything needed for dozens of experiments. Kitchen and bathroom cabinets hold surprisingly complete science laboratories.
What science concepts do these experiments teach?
Beginner experiments cover fundamental chemistry, physics, biology, and earth science concepts. You’ll learn about chemical reactions, acids and bases, density, surface tension, forces and motion, plant biology, crystal formation, and weather patterns. These foundational concepts build understanding that supports more advanced scientific learning later.
How can I make experiments more educational?
Enhance learning by predicting results before starting, recording observations during experiments, and discussing why things happened afterward. Research the science behind each experiment to understand underlying principles. Try variations by changing one element and observing different results. This systematic approach transforms simple activities into comprehensive learning experiences.
What should I do if an experiment doesn’t work?
Failed experiments provide valuable learning opportunities. Review your procedure to identify possible errors in measurements, timing, or technique. Check that materials haven’t expired or become contaminated. Research whether environmental factors like temperature or humidity might affect results. Trying again with adjustments teaches problem-solving and scientific persistence.
Are these experiments suitable for classroom use?
Yes, most easy science experiments for beginners work excellently in classroom settings. They’re affordable enough for multiple groups, quick enough to fit class periods, and engaging enough to maintain student attention. Teachers should review safety considerations and prepare materials in advance. Many experiments scale easily for large or small groups.
Where can I find more experiment ideas?
Science books from libraries offer hundreds of additional experiment ideas organized by age level and topic. Each successful experiment often suggests variations and extensions. Once you understand basic principles, you can design original experiments testing your own questions. The experimentation mindset becomes self-sustaining as curiosity drives continuous discovery.
More…
Author Bio
An experienced science educator and curriculum developer passionate about making scientific concepts accessible to learners of all ages. With a background in elementary education and a love for hands-on learning, the author specializes in creating engaging experiments that transform complex principles into exciting discoveries. Dedicated to proving that everyone can understand and enjoy science through simple, effective demonstrations.
Image Descriptions
Image 1: Colorful baking soda and vinegar volcano erupting with red lava foam overflowing from a homemade clay mountain on a protected workspace surface.
Image 2: Milk art experiment showing vibrant swirling patterns of multiple food coloring drops creating psychedelic designs after dish soap touches the milk surface.
Image 3:
Image 4: Celery stalks in colored water glasses showing progressive color absorption from white stems gradually turning bright red, blue, and green through leaves.
Image 5: